- Published on
Creating a Customized Input Component in a Streaming AI Chat Assistant Using Material-UI
- Authors

- Name
- Athos Georgiou
Building a Customized Input Component for an AI Chat Assistant
I have to admit, UI/UX is not my strong suit. Although I am a full stack developer, I tend to focus more on the backend and AI aspects of a project. But when I started working on a streaming AI chat assistant, I realized that I needed to improve my UI/UX skills. I thought that starting over with Titanium It would be a good idea to dabble in Material-UI for all my UI/UX needs. And I have to say, It's been a great experience so far.
As part of the series on building a streaming AI chat assistant from scratch using Titanium, I'll be sharing my experience with Material-UI and React. In this article, I'll walk you through the process of creating a customized input component for an AI chat assistant using Material-UI and React.
If you'd prefer to skip and get the code yourself, you can find it on GitHub, specifically in the Components section.
Overview
Our goal is to create a chat interface that handles user messages efficiently and integrates seamlessly with an AI response system. We'll use Material-UI components to build a custom input field with additional functionalities like file upload and command options.
Prerequisites
Before we dive in, make sure you have the following:
- A basic understanding of React and Material-UI. Documentation is your best friend: https://mui.com/material-ui/getting-started/
- Node.js and npm installed in your environment.
- A React project set up. I'm using Next.js for this project, but you can use any React framework or library. Keep in mind that the code snippets in this article are written in TypeScript and that quite a few of the functions are specific to Next.js, or Titanium in general.
Step 1: Setting Up the Chat Component
First, let's create the main chat component Chat.js, which will handle messages and AI responses.
// Chat.js
import React, { useState } from 'react';
import { v4 as uuidv4 } from 'uuid';
import MessagesField from './MessagesField';
import Loader from './Loader';
import CustomizedInputBase from './CustomizedInputBase';
import styles from './Chat.module.css';

interface IMessage {
  text: string;
  sender: 'user' | 'ai';
  id: string;
}

const Chat = () => {
  const [messages, setMessages] = useState<IMessage[]>([]);
  const [isLoading, setIsLoading] = useState<boolean>(false);

  const addUserMessageToState = (message: string) => {
    // Add user message to state
  };

  const handleAIResponse = async (message: string) => {
    // Process AI response
  };

  // Render chat interface
  return (
    <>
      {/* Render chat messages and input area */}
    </>
  );
};

export default Chat;
This component maintains the chat messages and loading state, and renders the CustomizedInputBase component. As you can see here, I am also using a simple Material-UI loader component to indicate loading state, and a MessagesField component to render the chat messages.
Step 2: Creating the CustomizedInputBase Component
The CustomizedInputBase component is where we implement the custom input field.
// CustomizedInputBase.js
import React, { useState, useRef } from 'react'
import { Paper, InputBase, IconButton, Menu, MenuItem } from '@mui/material'
// ... import Material-UI icons ...

const CustomizedInputBase = ({ onSendMessage }) => {
  const [inputValue, setInputValue] = useState('')

  const handleSendClick = () => {
    // Handle send message click
  }

  // JSX for the custom input component
  return <Paper component="form">{/* Menu, Input field, and Send button */}</Paper>
}

export default CustomizedInputBase
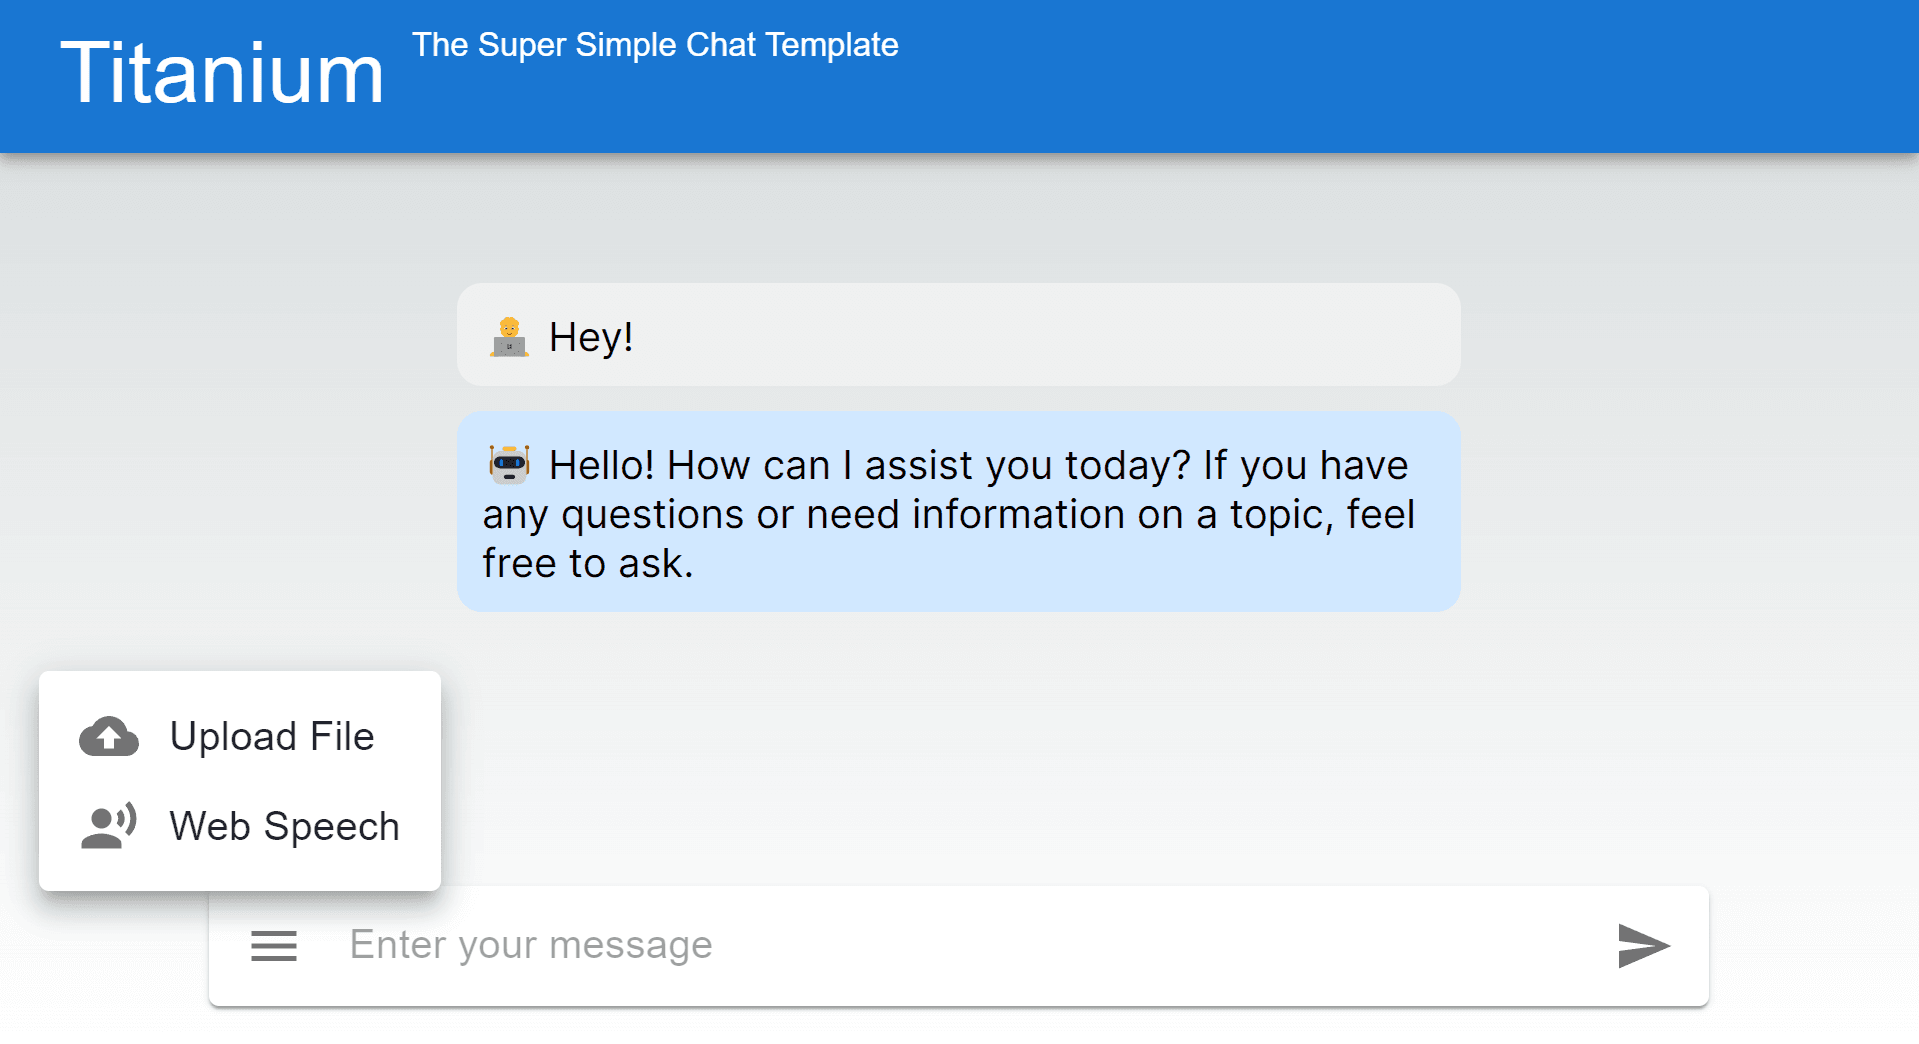
This component includes an input field, a send button, and a menu with additional options like file upload and speech commands. The setIsLoading prop is used to set the loading state in the parent component, and the onSendMessage prop is used to send user messages to the parent component.
Step 3: Handling User Input and AI Responses
In the Chat component, implement functions to handle user input and AI responses. Use the addUserMessageToState function to add user messages to the chat and addAiMessageToState for AI responses.
// Inside Chat component

const sendUserMessage = (message: string) => {
  // Send user message and handle AI response
};

    // Expanded code for message handling
    const handleSendMessage = async (message: string) => {
      if (!message.trim()) return;
      const aiResponseId = uuidv4();
      addUserMessageToState(message);
      const reader = await handleAIResponse(message);
      if (reader) {
        await processAIResponseStream(reader, aiResponseId);
      }
    };

    // Render chat interface with messages and input area
    return (
      <>
        {isLoading && <Loader />}
        <MessagesField messages={messages} />
        <div className={styles.inputArea}>
          <CustomizedInputBase
            setIsLoading={setIsLoading}
            onSendMessage={handleSendMessage}
          />
        </div>
      </>
    );
Step 4: Integrating with AI Streaming Service
Integrate the chat with your AI streaming service using functions like handleAIResponse and processAIResponseStream. These functions should handle sending user messages to the AI service and processing the streamed responses.
// Inside Chat component

const processAIResponseStream = async () => {

    // Expanded code for processing AI response stream
    const processAIResponseStream = async (reader, aiResponseId) => {
      const decoder = new TextDecoder();
      let aiResponseText = '';

      const processText = async ({ done, value }) => {
        if (done) {
          addAiMessageToState(aiResponseText, aiResponseId);
          return;
        }

        const chunk = value ? decoder.decode(value, { stream: true }) : '';
        const lines = chunk.split('\n');

        lines.forEach((line) => {
          if (line) {
            try {
              const json = JSON.parse(line);
              if (json?.choices[0].delta.content) {
                aiResponseText += json.choices[0].delta.content;
              }
            } catch (error) {
              console.error('Failed to parse JSON:', line, error);
            }
          }
        });

        return reader.read().then(processText);
      };

      await reader.read().then(processText);
    };

};

    // Expanded code for message handling
    const handleSendMessage = async (message: string) => {
      if (!message.trim()) return;
      const aiResponseId = uuidv4();
      addUserMessageToState(message);
      const reader = await handleAIResponse(message);
      if (reader) {
        await processAIResponseStream(reader, aiResponseId);
      }
    };

    // Render chat interface with messages and input area
    return (
      <>
        {isLoading && <Loader />}
        <MessagesField messages={messages} />
        <div className={styles.inputArea}>
          <CustomizedInputBase
            setIsLoading={setIsLoading}
            onSendMessage={handleSendMessage}
          />
        </div>
      </>
    );
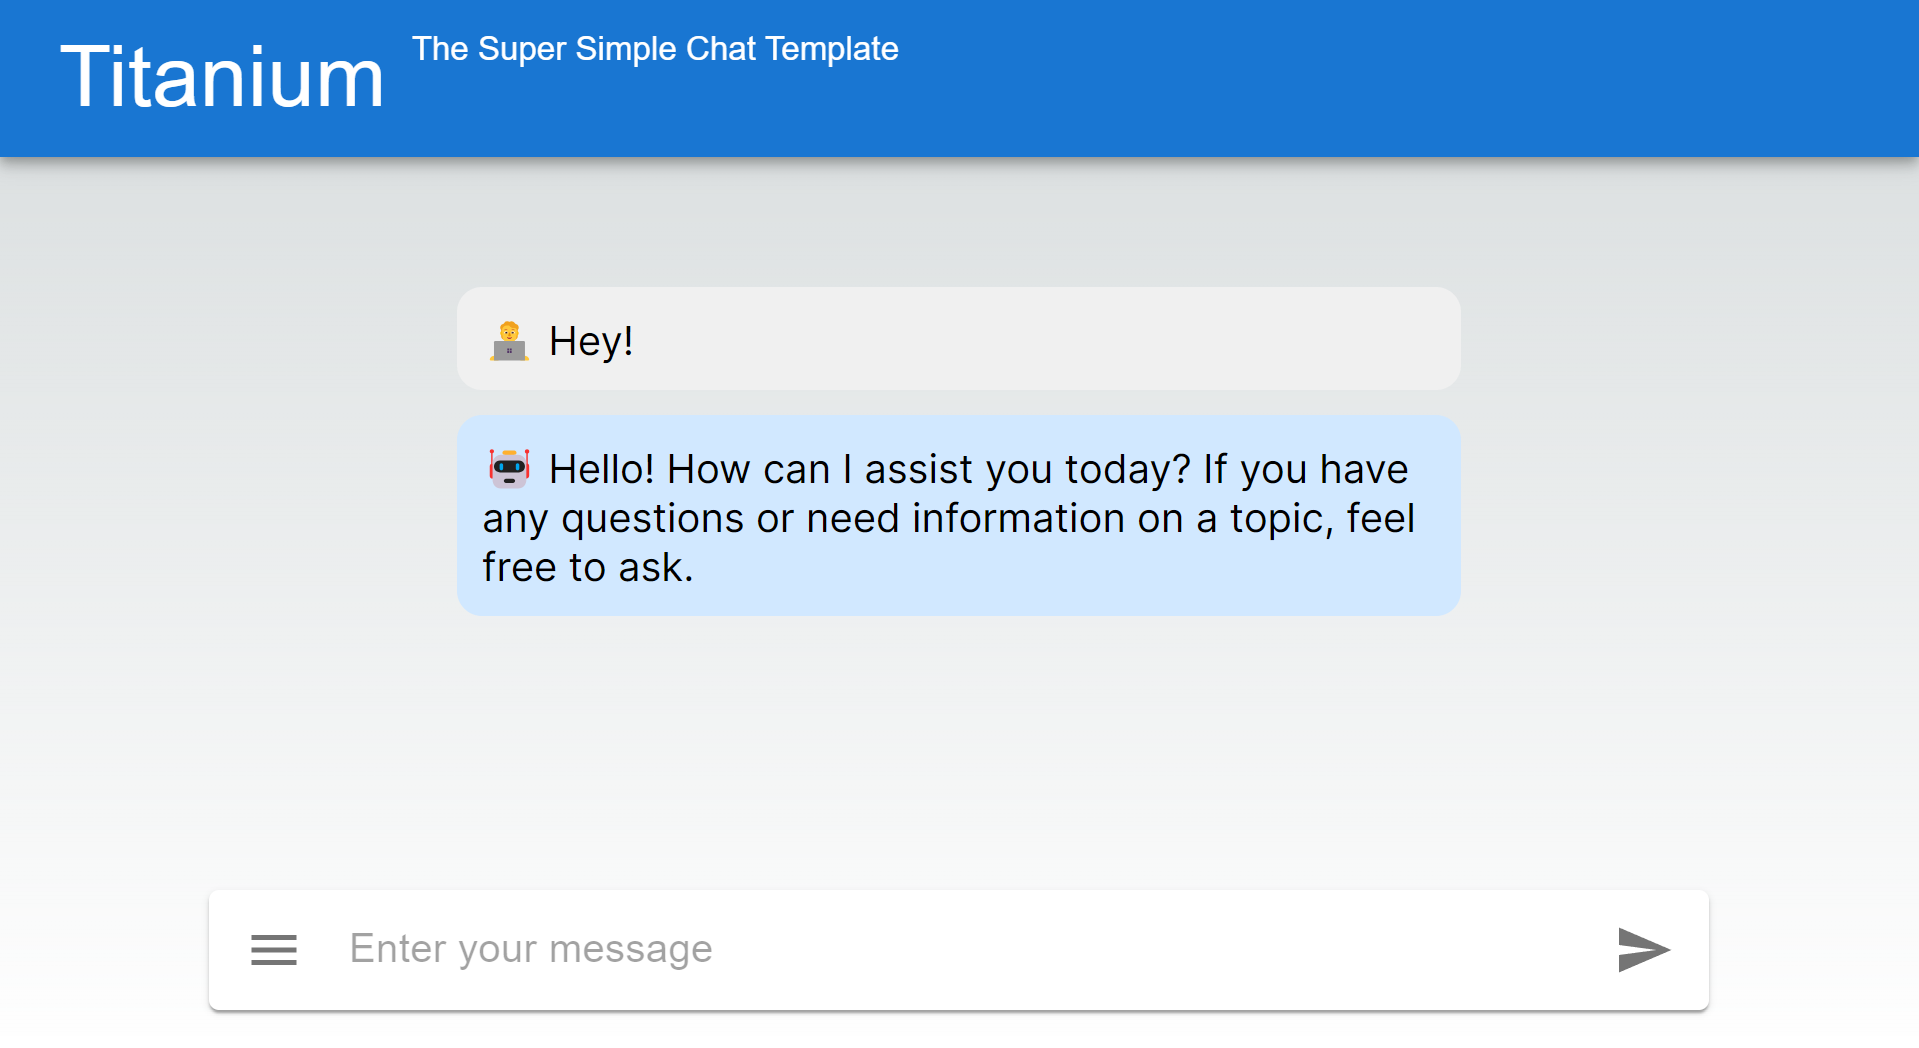
How does it look?

And when the user clicks on the menu icon, the menu expands to show additional options:

Doesn't look to bad, right?
That's all for now!
I hope this guide on creating a customized input component for an AI chat assistant using Material-UI and React has been helpful. I know it may all look a bit condenced, but I wanted to keep the article short and to the point. In follow-up articles, I'll be enriching the UI with additional Material-UI components and features, so stay tuned!
If you have any questions or comments, feel free to reach out to me on GitHub, LinkedIn, or via email.
See ya around and happy coding!
